Laser Tuning
Overview
There's a few things that may lead you to wanting to tune the laser of your GameCube DVD Drive. The main one is a Disc Read Error, also referred to as a "DRE". A disc read error can occur many ways but they are all the same thing - the laser has lost focus of the disc and cannot read data back. This can be from:
- A dirty or scratched disc
- A dirty lens
- A failing laser (where by after sitting idle for too long it has lost focus and shut down, or due to very high demands on the laser via quick seeking and reading)
It is also possible to have a really bad case of the above and the laser won't even be able to sense the disc (it will spin up, click a few times then stop).
To see what is actually causing your DRE or the inability to read a disc entirely, see the section below on Diagnosing.
Diagnosing
First you need to identify what is wrong with your GameCube DVD drive laser lens.
A process of elimination should be used to identify what is wrong. This guide assumes you have a modchip or are using Swiss or something to read DVD-R when talking about backups. The definition of "able to read" below simply means, if the game is able to start up or display the banner in the GameCube IPL.
Make sure the disc you are about to try and read can be read. Make sure it's an original disc and make sure it looks clean/scratch free. If it looks really clean, check its thickness against another disc in case it has been buffed.
- Is your GameCube able to read any original discs?
- No? Clean the Lens
- Still No? Adjust the Potentiometer
- Still No? Time for a new laser
- Is your GameCube able to read any DVD-R?
- If it's a Game you're trying - make sure it's a verified dump, and burn the disc again and this time using the verify feature of your drive
- No? Clean the Lens
- No? Try better DVD-R media (Ritek G04/G05, Verbatim dark dye)
- Still No? Adjust the Potentiometer
- Still No? Time for a new laser
- Is your GameCube able to read any DVD+R or DVD-RW?
- These are only supported on certain drive patches, XenoGC should support both but may require a very low value to be set on the potentiometer, go through the steps for DVD-R once you've confirmed your patch code can read them.
- Is your GameCube able to read media but you get DRE in the game?
- If the DRE is always at an exact spot in the game and it's a backup, verify if it's a clean rip (use redump.org) or burn again with verify on. If it's an original, it's likely that there is a deep scratch or issue with the disc, this may not be evident by the naked eye if the disc has been re-buffed at a video store/etc. If it's an Audio streaming backup, it could mean that the modchip or set of drive patches (for example, older Swiss or GCoS) in use does not support audio streaming from backups - if so, get a more compatible modchip/software.
- If the DRE is random perform the same steps depending on DVD-R or original media above, perhaps lowering the potentiometer even further or buying a new laser.
Potentiometer Adjustment
Also known as laser pot adjustment, laser tweak, pot tweak, pot adjustment, and other names, is the process of fine tuning the value of an adjustable resistor (known as a potentiometer) to allow improved performance with reading of DVD+/-R discs. The factory settings of the potentiometer varied from DOL-001 with a value range of 450 ohm - 600 ohm while the DOL-101 had a value range of 150 ohm - 250 ohm. Some lasers require adjustment to eliminate DRE or to read DVD+/-R. There is no magic value which allows a certain type of disc to be read, however performance improvements can only be expected when lowering the laser's impedance (resistance) value. There are two resistors on the DVD drive board which affect the impedance. One is the adjustable potentiometer, the other is a fixed resistor at 150ohm. The lowest value possible seen by the laser from the DVD drive board will be 150 ohm. With this in mind adjust the pot as necessary to go as low as required to achieve desired result.
Cleaning
- Clean the laser by removing any dust and using a q-tip with some Isopropyl alcohol. Do not touch the laser directly with your hands, use only the q-tip to do it.
- Make sure discs are clean from any dust or particles too (do not buff the discs unless absolutely necessary)
Installing a new laser
TODO pictures, expand.
- Disassemble the GameCube
- Remove the drive cage from DVD drive
- De-solder the cables from the DVD drive board and remove the board completely
- Remove laser block
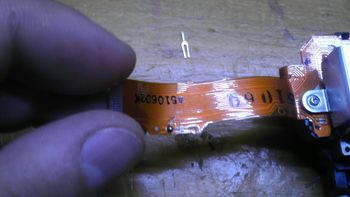
De-solder the blob on the new laser flex cable (be careful not to burn it) Picture credit: psyko_chewbacca - Install the laser block
- Perform potentiometer adjustment from sane values at first (start at 450 ohms)
